Connecting and Using SendGrid
Published on October 3, 2023
Introduction
SendGrid is a powerful email delivery service that allows you to send emails efficiently and effectively. Integrating SendGrid into your product can enhance your communication capabilities and enable you to reach your users seamlessly.
In this blog post, we will walk you through the process of connecting and using SendGrid with CodelessAPI. Whether you want to send transactional emails, marketing campaigns, or notifications, SendGrid has got you covered.
Why Use SendGrid in Your Product?
SendGrid offers several advantages for email communication in your product:
- High deliverability rates for your emails.
- Scalable infrastructure to handle email volume.
- Detailed analytics to track email performance.
- Easy-to-use APIs for seamless integration.
Getting Started with SendGrid Integration
Here's a step-by-step guide to connecting and using SendGrid in your product:
Step 1: Sign Up for SendGrid
If you haven't already, sign up for a SendGrid account. You can choose the plan that suits your email sending needs, including a free tier for small-scale usage.
Step 2: Obtain Your API Key
After signing up, navigate to your SendGrid dashboard and generate an API key. This key will be used to authenticate CodelessAPI's interactions with SendGrid. Follow this tutorial to generate your SendGrid API key. Make sure to save the generated API key for later.
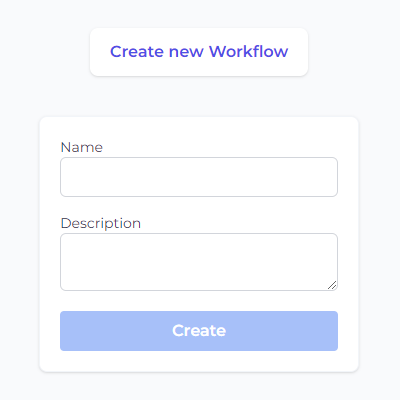
Step 3: Create a new Workflow
- Log in to your CodelessAPI.io account and click on the "+ Create new Workflow" button in the Workflow section of your dasboard.
- Provide a name and description for your Workflow. Click on "Create" and you will be redirected to the Workflow builder page.
Step 4: Adding the SendGrid Module
- On the left sidebar, find the "Advanced Operations" section and expand it. Select the "SendGrid" option and drag it onto the canvas.
- You'll now see the SendGrid module on your canvas. Let's configure it to connect to your SendGrid account securely.

Step 5: Configuring SendGrid module
To send emails using SendGrid, you need to provide your SendGrid API key that you generated from step 2.
- Click on the SendGrid module on the canvas, and then select "Configure" from the options.
- In the configuration panel, click on "New SendGrid Account" and paste your SendGrid API key. Provide a name and description for the account.

- You'll now be able to configure the email configuration by clicking on your SendGrid account and then filling out the columns.

- The "From email" options is set automatically based on the emails you have verified from your SendGrid account. The rest of the columns can either be set with the "manual" option or the "map" option. The manual option let's you hardcode the entry.
The map option is useful for automating and sending mass emails. You can connect a data source to your SendGrid module and then select a field from your data source. I.e. if you have a leads list in Google Sheets with columns "Email", "Subject", "Personalized email", you can connect a Google Sheets module to your SendGrid module, select "map" for the fields you want populated from Google Sheets, and then select the relevant field. This will automatically send a new email for every row in your Google Sheets table.
Step 6: Linking the Modules
- Click on the Start module, and then click "Link". Next, click on the SendGrid module. You'll see a line going from the Start module to the SendGrid module, with the arrow pointed to the SendGrid module.
- Repeat the process for the SendGrid module to the End module. Your canvas will now look like this:

Step 7: Run the workflow
Before finalizing your API, use CodelessAPI.io's built-in run feature to validate your API endpoint and ensure that the emails are being sent correctly. Click the "Run" button at the bottom of the left side panel to test your workflow.
Once you are satisfied with the results, you can either run your Workflow manually, or copy the API associated with your Workflow and having it triggered based on an event. You can find your Workflow API by clicking on the "Start" module and then selecting the "Configuration" option. Copy the API link provided.
Conclusion
You've successfully connected SendGrid to CodelessAPI and automated email sending. This powerful combination, along with source modules allows you to send personalized emails at scale without writing complex code.
Start leveraging this integration to enhance your product's communication with users. If you encounter any challenges or have questions, feel free to reach out to us at hello@codelessapi.io. We're here to assist you in optimizing your email workflows.
Empower your product with automated, personalized emails. Happy emailing!